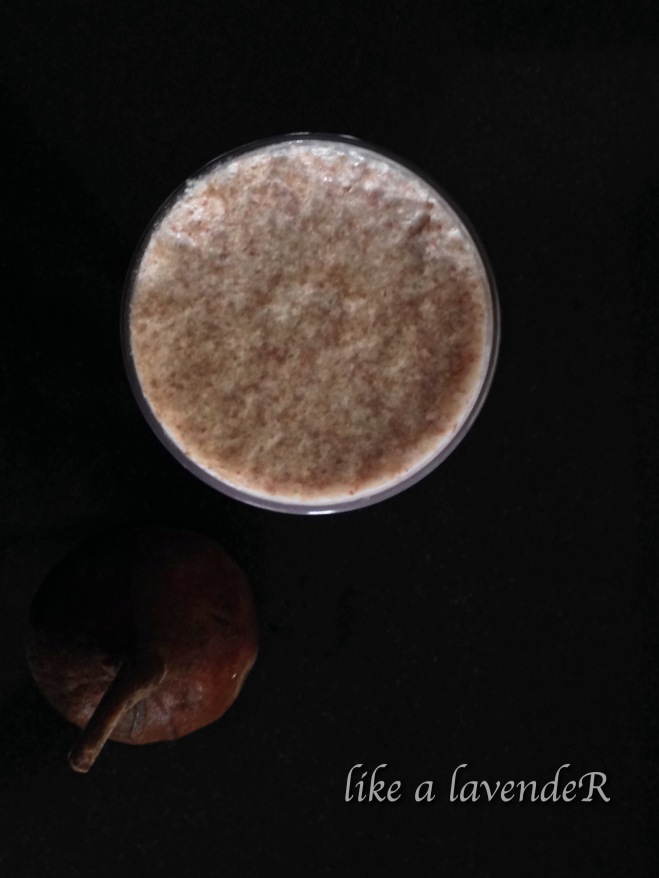
Guest post by Megha from Me in Blogland.
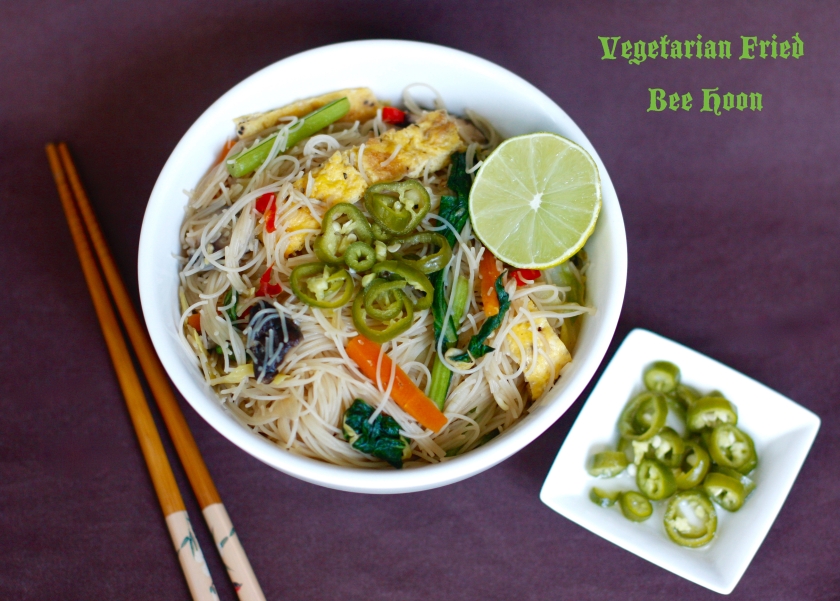
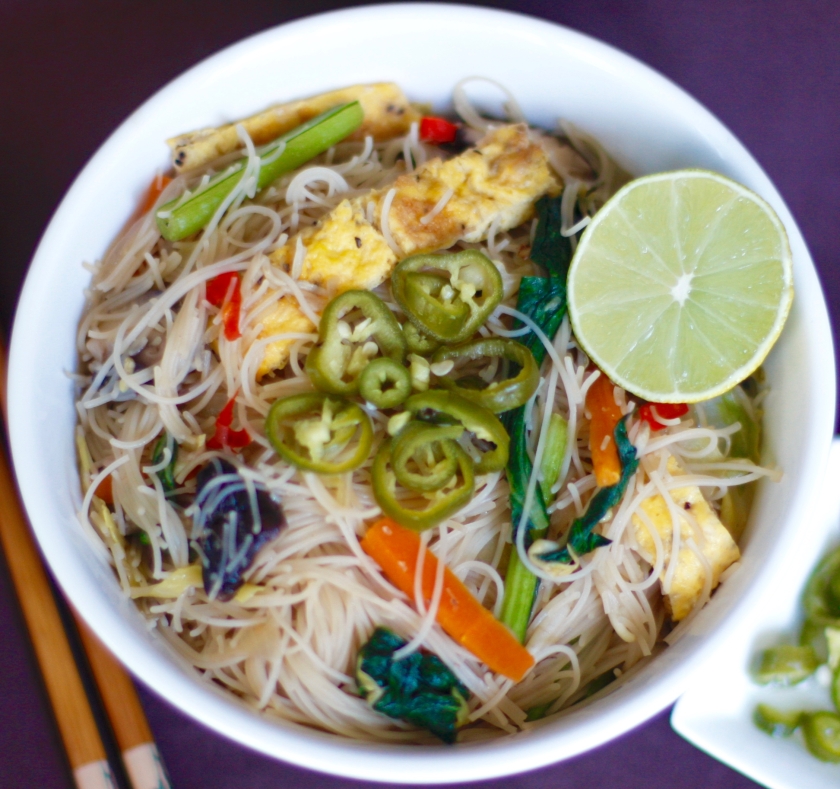
Singaporean Stir fried rice vermicelli noodles
Hello again to the readers of ‘Like a lavendeR’!
I’m back! If you are not familiar with who I am and why I have invaded this space, I suggest you quickly take a peek at the previous post on this blog so we can get acquainted (or reacquainted in case you have forgotten!) before I proceed

Please bear with me one more time while I give your regular hostess a breather while she gets her bearings straight after the big move. I assure you, she will be back with plenty of interesting posts regarding food, travel, decor and much more in no time at all!
After giving you a taste of something sweet, this time round, I have for you a savoury local (Singaporean dish) to tickle your tastebuds. Like last time, I had a blast doing this post and would like to express my gratitude to Reshma again for making me feel like a welcome guest on this lovely space
Fried bee hoon (stir-fried rice vermicelli noodles) is a typical breakfast dish in Singapore and Malaysia. It is commonly available at hawker centres (open-air cooked food centres) and usually termed “economic fried bee hoon”. The name may not sound very appealing but this is a humble local one-pot dish that is simple, tasty and satisfying.
My first try with bee hoon was way back in January of 2008. I had just been offered a scholarship for a graduate research program at the local university. During the first week of my graduate student days, me and my fellow labmates were informed of a welcome lunch that was being organized in the conference room. Up until that point, my experience with local cuisine despite having lived in Singapore for two years was next to zero and I had no idea what to expect. I entered the conference room hesitantly and was immediately struck by a range of unfamiliar sights and smells. Everyone seemed to be excited and swarming around a special duck preparation that had been ordered just for the occasion. I spotted a few fried items that I could not fathom. There was a platter of some strange looking unnaturally colored squares (which turned out to be kueh and they were quite nice) which befuddled me. Ignoring my rumbling tummy, I looked around frantically trying to see if there was anything that was suitable for me to eat. There was an affable Malay aunty whom I had befriended on the first day and who was usually in charge of these lunches. She must have sensed my apprehension because she approached me, gently patted my hand and said – “I didn’t forget about you. See, I have made bee hoon for you. Try it and tell me if you like it”. She led me to a large casserole dish and opened the lid. Inside there were thin noodles tossed with vegetables, greens, egg and bean sprouts. I heaved a huge sigh of relief! The noodles were very different from the Indian style of rice noodle preparation that I was used to but I enjoyed it nonetheless.
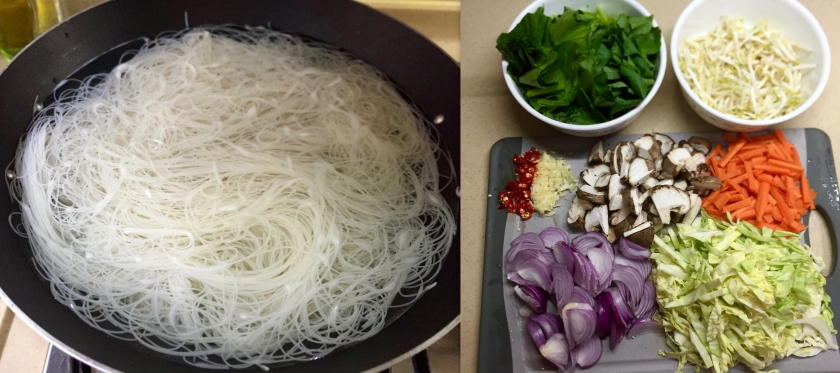
I make bee hoon occasionally at home to give a local spin to my cooking. I cannot claim this recipe to be authentic because it came together after a few trials but I have stuck to the basics and believe me when I say it is a trustworthy recipe. This dish is versatile and can be easily customized to suit your dietary preferences. It is naturally gluten-free. Omit the egg and it becomes vegan-friendly. Many recipes incorporate chicken or prawns in them which caters to the non-vegetarians. There is considerable prep work involved, but once you have everything in place, the cooking is pretty much smooth sailing. Many of my local friends balk at the sight of bean sprouts (called ‘taugeh’) but I love the crunchy texture so I include them. And before I forget to mention, one condiment I absolutely must have on the side with this dish is pickled green chillies. You can either buy it from the store but don’t worry if it isn’t available because preparing it at home is a cinch! I have provided the recipe in case you would like to give it a go like I did 🙂
Scroll down to the notes section where I have given a list of suggestions regarding variations to this dish.
i
Happy cooking!
i
Vegetarian Fried Bee Hoon
Preparation time: 30 minutes; Cooking time: 20 minutes
Total time: 50 mins
Recipe category: Main Course (Southeast Asian)
Recipe difficulty level: Easy
Serves: 4-6
i
Ingredients:
400 g rice vermicelli/beehoon
2 medium onions, thinly sliced
4-5 cloves garlic, minced
2-3 fresh bird’s eye red chilli, finely chopped
1 large carrot, julienned
1/2 head of a small round cabbage, thinly sliced
4-5 fresh shiitake mushrooms, discard the stems and slice the caps
1 large bunch choy sum, roughly chopped
200 g bean sprouts, rinsed and drained
2 eggs, beaten and lightly seasoned, Optional
3 tablespoons light soy sauce
2 tsp brown sugar
600 ml vegetable stock
Salt to taste
Freshly cracked black pepper to taste
3 tbsp vegetable or sesame oil for frying
To serve:
Pickled green chillies
i
Method:
1. Soften vermicelli in warm water for 30 minutes till soft. Drain and set aside. While the vermicelli is soaking, prep all your ingredients.
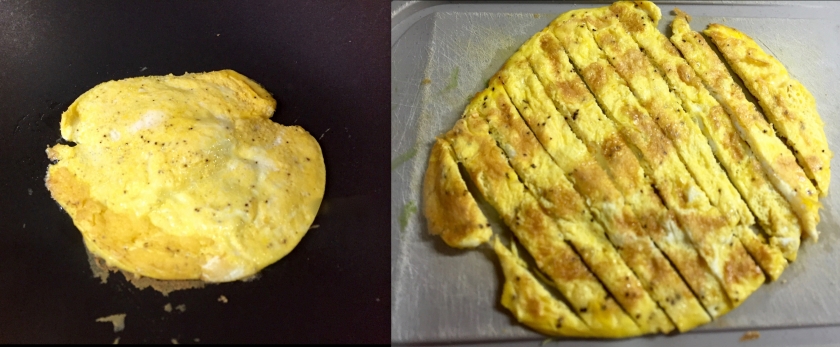
2. Heat a 2 tsp oil in wok over medium heat (I used a non-stick wok). Add the beaten egg mixture and cook on both sides like an an omelette. Remove the omelette , cut into strips and keep aside.
3. Heat the remaining oil in the same wok on high heat and fry the onions for 2 minutes and then the garlic and fresh red chillies until fragrant.
4. Add julienned carrots and sliced cabbage, fry for 2 minutes and add in the mushrooms and stir-fry for a minute.
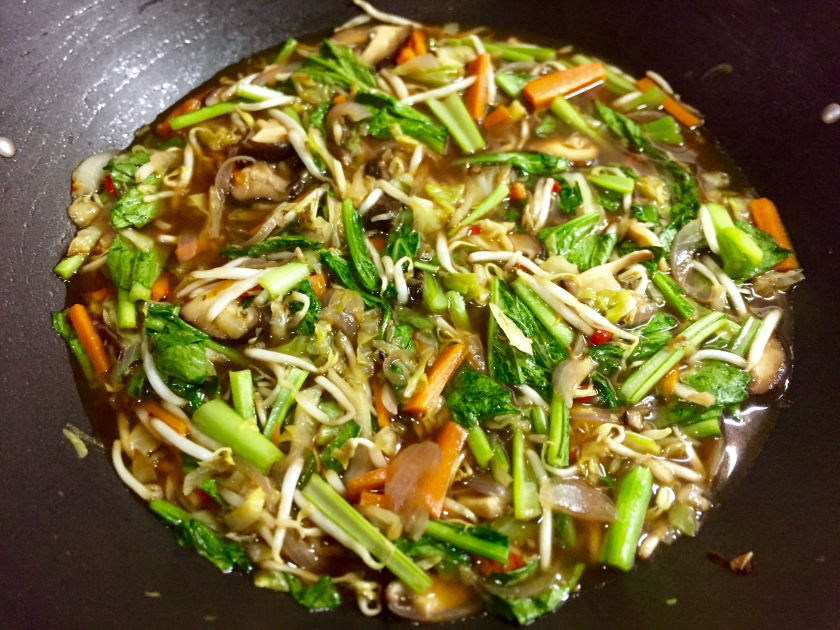
5. Add the choy sum, bean sprouts, soy sauce, brown sugar and vegetable stock. Stir evenly then braise over low heat for 5 minutes.
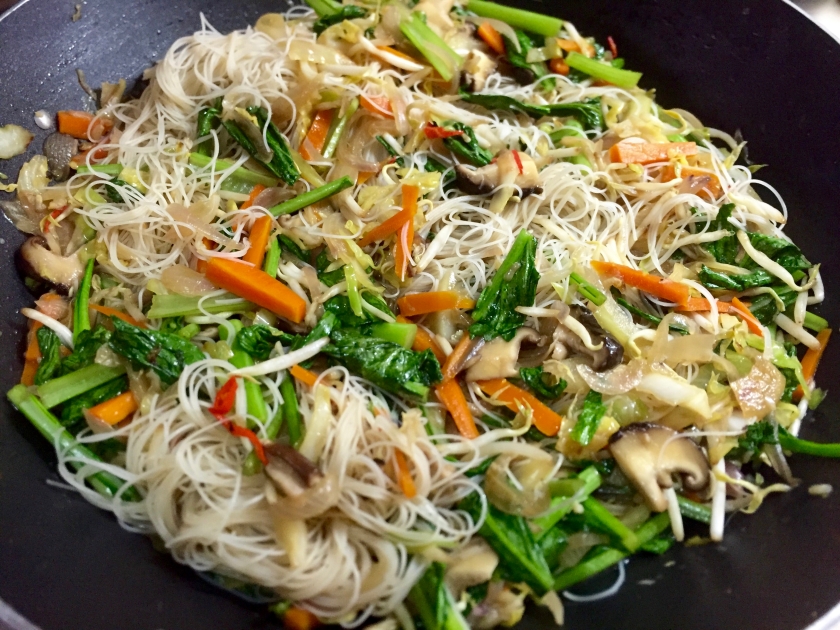
6. Add vermicelli and salt to taste. Cook until all the water is absorbed (this may take a while). Season with freshly cracked black pepper if desired. Add in the omelette strips. Stir continuously to coat all the noodles and incorporate all the vegetables.
7. Use tong or a large pair of chopsticks to toss the vermicelli, so as not to risk breaking it up and making it mushy.
8. Serve hot alongside pickled green chillies.
i
Method to make pickled green chillies:
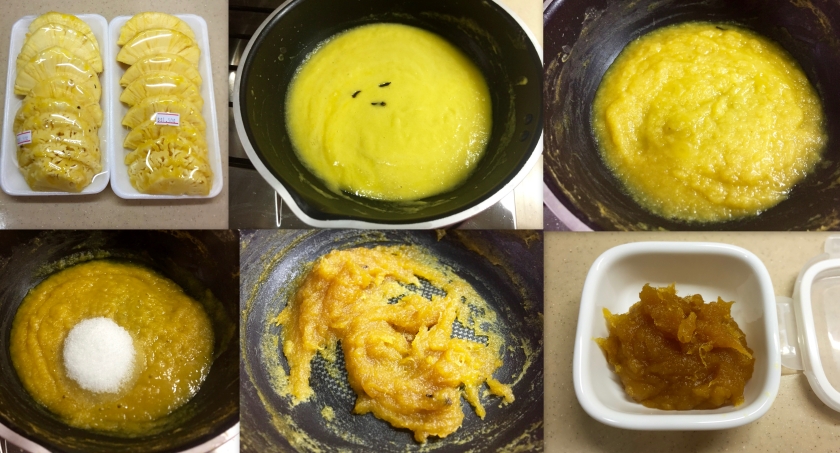
Placed 5 thinly sliced finger length green chillies in a bowl, pour hot water over it and let stand for about 20 seconds. Drain the chillies, then add it to a glass bottle. Meanwhile, in a saucepan, bring the following to a simmer: 1/2 cup white rice vinegar, 3 level tbsp sugar and 1/4 tsp salt, until the sugar dissolves. When the vinegar solution has cooled down, pour it into the glass bottle with the cut chillies. Store in a covered glass bottle and refrigerate. The pickled chilli will be ready as soon as they turn a lighter shade of green, about one to two hours, and can be stored in the fridge for weeks.
i
Notes:
- To make this dish healthier, you can substitute organic brown rice vermicelli instead of the regular white variety
- You can use shallots instead of onions and slightly reduce the quantity of garlic
- If you don’t have choy sum, you can substitute with bok choy. If both are not available, you can use spinach
- If you don’t have vegetable stock on hand, you can crumble one vegetable stock cube into 600ml of water and then use as described
- You can use fried/grilled cubes of firm tofu in this recipe
- Be careful while adding the salt because soya sauce is salty and so could the stock be
- You can add in scallion/spring onion greens for garnish if desired
- If you would like additional tartness, you could squeeze some lime juice (calamansi lime) or you could use some of the pickling liquid from the pickled green chillies
- You can also serve the bee hoon with sambal chilli


 3. Blend till smooth
4. Serve immediately
3. Blend till smooth
4. Serve immediately